Procedure how to flash a firmware (quick reference)
|
NOTICE |
|
|---|---|
|
Firmware Download Due to download a firmware, application-specific parameter settings are overwritten and become invalid! Steps to prevent:
|
|
|
NOTICE |
|
|---|---|
| Material Damage! |
Damage to the hardware Connecting or disconnecting the interface connectors while they are carrying voltage can damage the hardware. Steps to prevent:
|
Connect your PC with your device
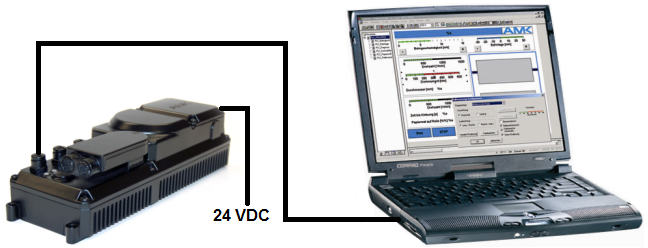
Connection variants:
Siehe 'Establishing a connection between the PC and the AMK device'.
24 VDC logic supply 'on'
Wait for device initialization. The initialization is finished if one of the following leds are on.
|
LED |
green |
orange |
red |
|
|---|---|---|---|---|
|
A-Series |
H0 | on | - | on |
| KE | H1 | on | on | on |
| Decentralize devices | H1 | on | on | on |
|
Ethernet controller cards |
H2 | on | on | on |
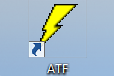
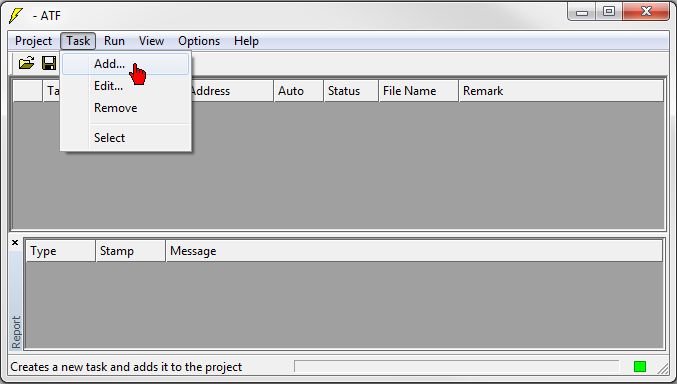
Execute ATF
|
|
AIPEX PRO must be closed! |

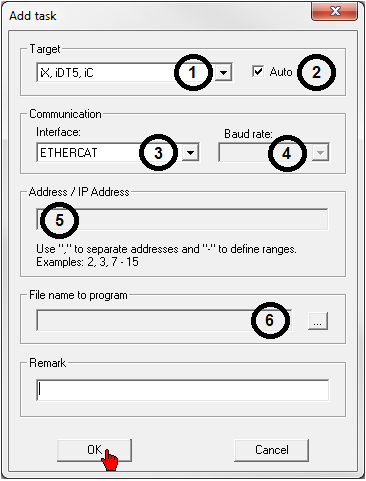
Target
1. Select target hardware
2. Activate the option 'Auto': ATF activate the flash mode automatically.
If the option 'Auto' is deactivated, the user must activate the flash mode manually.
E. g. the user have to set a jumper at the hardware to activate the flash mode.
Communication
3. Select 'Interface' (connection between PC and device)
4. Adjust 'Baud rate' (necessary USB-to-CAN1 and COM)
AMK factory setting:
CAN: 1000 kBaud (actual value: see instance 0, ID34024 'BUS transmit rate')
COM: The default value depends on the selected device. If a communication error occurs, causes by e. g. through insufficient shielding, the transmission rate must be reduced. Depending on the device, in this case the user must activate the flash mode manually.
|
|
The baud rate of the PC COM interface must be set to a same or lower value than on the target hardware. |
Address / IP Address
5. Adjust bus participant address (necessary for Ethernet, EtherCAT, VARAN, SERCOS III)
AMK factory setting address:
A-Series: 192.168.0.1
EtherCAT: 1
CAN devices: 2
|
|
The bus participant address can be read and displayed with AIPEX PRO menu 'Direct mode' → 'Communication' |
File name to program
6. Select firmware version
Accept with 'OK'
Flashing the firmware
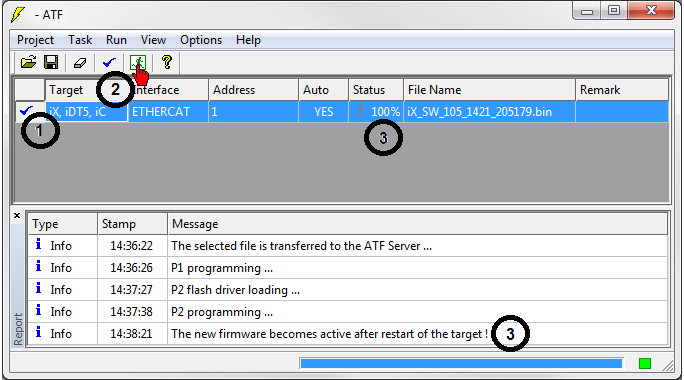
1. Select programming task. Siehe 'Select task'.
2. Execute flashing. Siehe 'Menu - Run'.
|
|
The transfer and flashing of the firmware may take several minutes, depending on the connection! Do not, under any circumstances, switch off or disconnect the device! |
3. Status 100%, switch off the device, wait at least 10 s, and then switch the device back on.
Close ATF
24 VDC logic supply 'on'
Wait for device initialization. The initialization is finished if one of the following leds are on.
|
LED |
green |
orange |
red |
|
|---|---|---|---|---|
|
A-Series |
H0 | on | - | on |
| KE | H1 | on | on | on |
| Decentralize devices | H1 | on | on | on |
|
Ethernet controller cards |
H2 | on | on | on |
Execute AIPEX PRO
Call AIPEX PRO menu 'Online' → 'Log on'
|
|
If the new firmware is not address compatible with the parameter memory data, the device generate automatically the request for 'Initial Loading' (error message '1293'). Accept with 'OK' After initial loading you have to do a power cycle (24 VDC off/on), following you have to reload the customer specific parameters (manually or with AIPEX PRO). |
